Reinforcement Learning in a few lines of code
Reinforcement learning has seen major improvements over the last year with state-of-the-art methods coming out on a bi-monthly basis. We have seen AlphaGo beat world champion Go player Ke Jie, Multi-Agents play Hide and Seek, and even AlphaStar competitively hold its own in Starcraft.
Implementing these algorithms can be quite challenging as it requires a good understanding of both Deep Learning and Reinforcement Learning. The purpose of this article is to give you a quick start using some neat packages such that you can easily start with Reinforcement Learning.
For in-depth tutorials on how to implement SOTA Deep Reinforcement Learning algorithms, please see this and this. They are highly recommended!
Environments
Before we can start implementing these algorithms we first need to create an environment to work in, namely the games. It is important for the algorithm to understand what is action and observation space. For that, we will go into several packages that can be used for selecting interesting environments.
Gym
Gym is a toolkit for developing and comparing reinforcement learning algorithms. It is typically used for experimentation and research purposes as it provides a simple to use interface for working with environments.
Simply install the package with: pip install gym. After doing so, you can create an environment using the following code:
import gym
env = gym.make(‘CartPole-v0’)
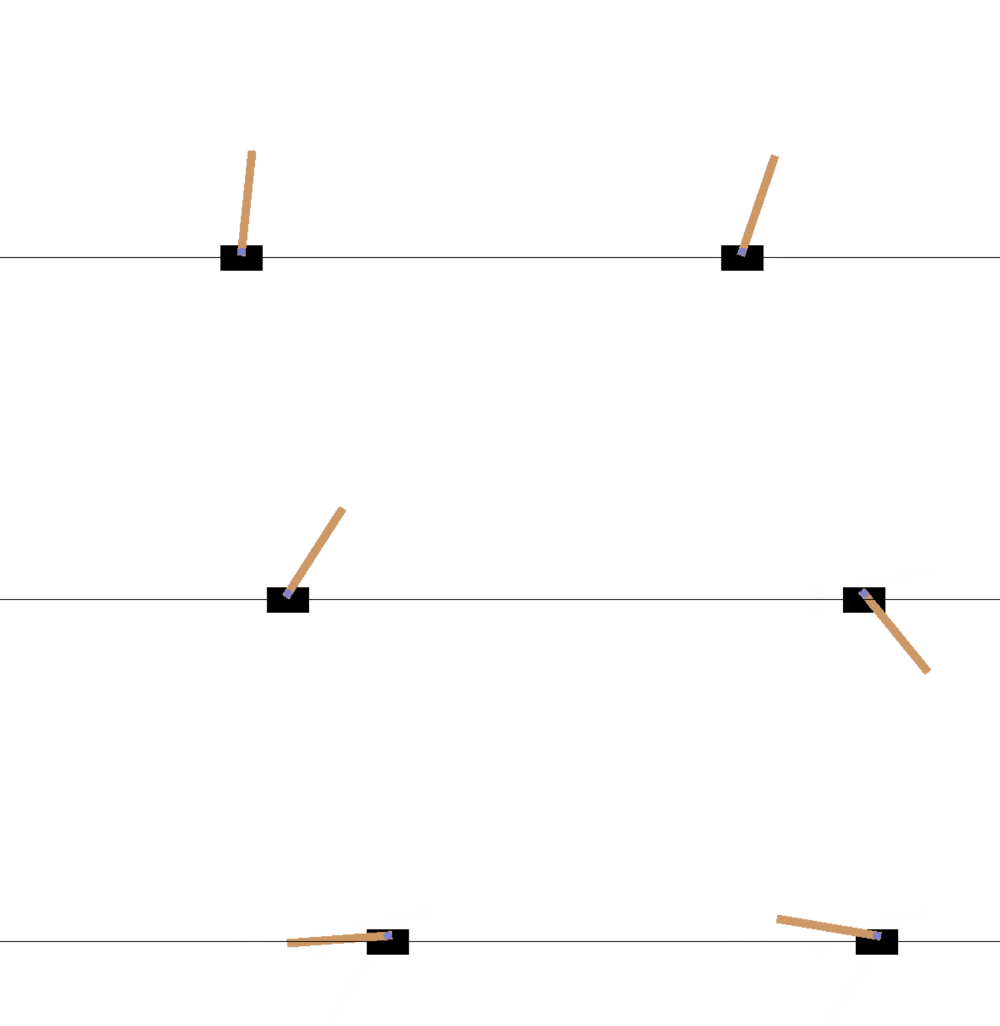
In the CartPole environment, you are tasked with preventing a pole, attached by an un-actuated joint to a cart, from falling over.
The env variable contains information about the environment (the game). To understand what the action space is of CartPole, simply run env.action_space which will yield Discrete(2). This means that there are two discrete actions possible. To view the observation space you run env.observation_space which yields Box(4). This box represents the
Cartesian product of n (4) closed intervals.
To render the game, run the following piece of code:
import gym
env = gym.make('CartPole-v0')

obs = env.reset()
while True:
    action = env.action_space.sample()
    obs, rewards, done, info = env.step(action)
    env.render()

    if done:
        break

We can see that the cart is constantly failing if we choose to take random actions. Eventually, the goal will be to run a Reinforcement Learning algorithm that will learn how to solve this problem.
For a full list of environments in Gym, please see this.
NOTE: If you have a problem running the atari games, please see this.
Retro
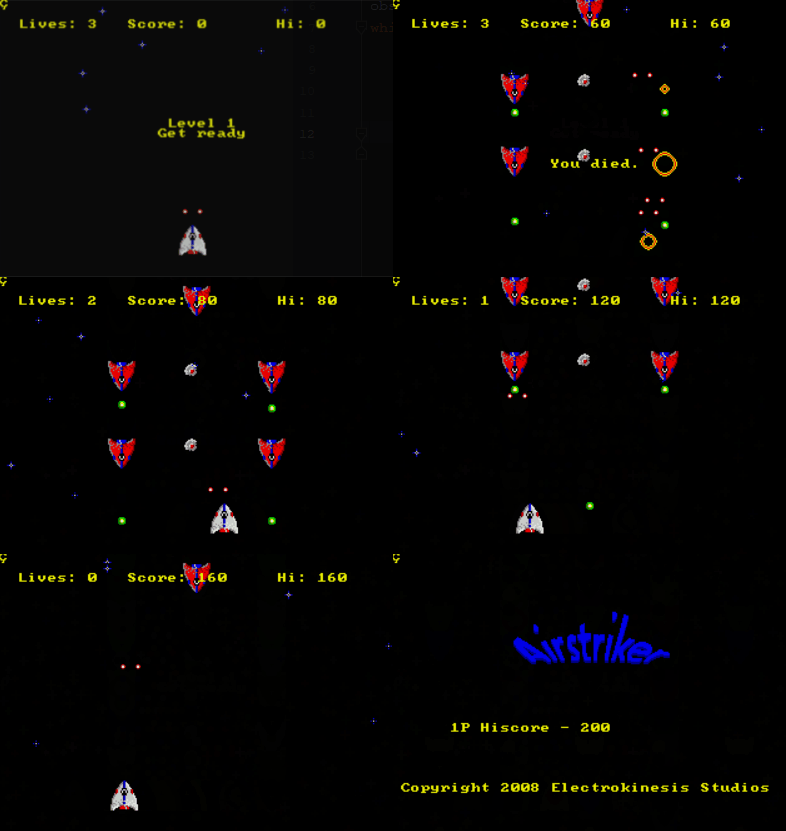
Another option for creating interesting environments is to use Retro. This package is developed by OpenAI and allows you to use ROMS to emulate games such as Airstriker-Genesis.
Simply install the package with pip install gym-retro. Then, we can create and view environments with:
import retro
env = retro.make(game='Airstriker-Genesis')
Again, to render the game, run the following piece of code:
import retro
env = retro.make(game='Airstriker-Genesis')

obs = env.reset()
while True:
    action = env.action_space.sample()
    obs, rewards, done, info = env.step(action)
    env.render()

    if done:
        break

To install ROMS you need to find the corresponding .sha files and then run:
python3 -m retro.import /path/to/your/ROMs/directory/
NOTE: For a full list of readily available environments, run retro.data.list_games().
Procgen
A typical problem with Reinforcement Learning is that the resulting algorithms often work very well with specific environments, but fail to learn any generalizable skills. For example, what if we were to change how a game looks or how the enemy responds?
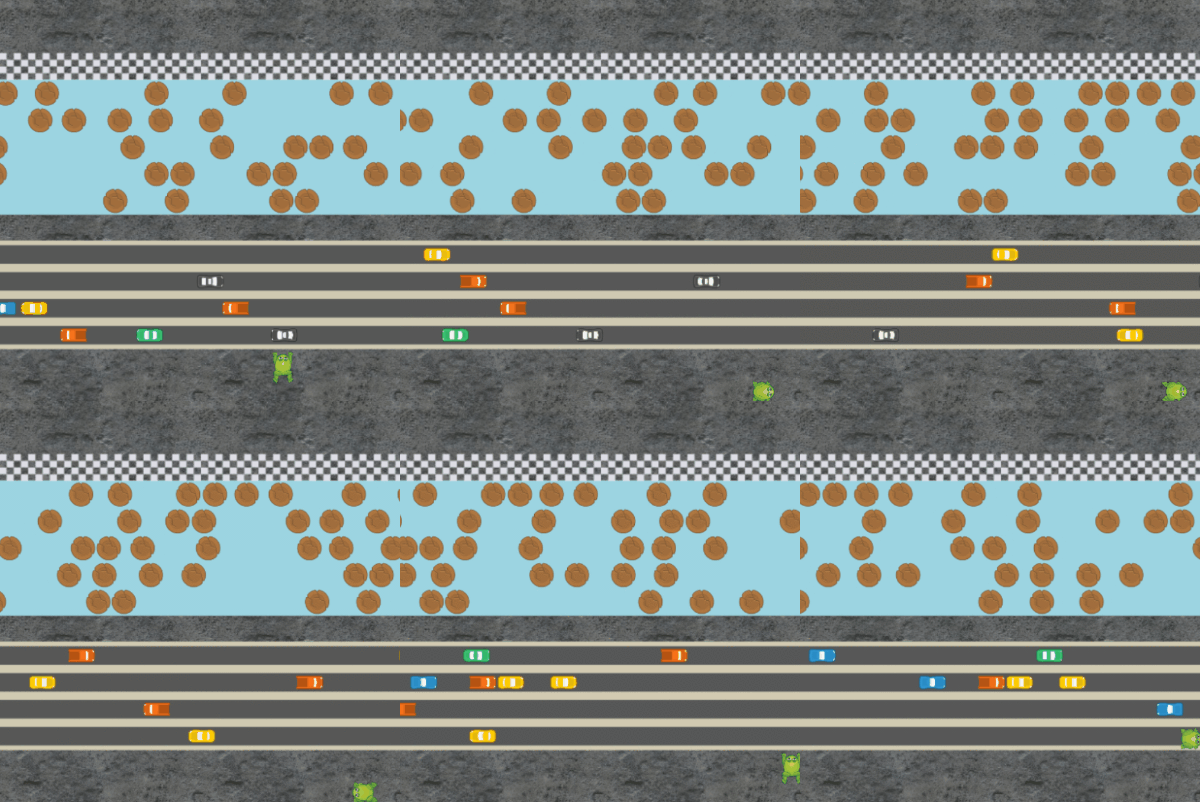
To solve this problem OpenAI developed a package called Procgen, which allows creating procedurally-generated environments. We can use this package to measure how quickly a Reinforcement Learning Agent learns generalizable skills.
Rendering the game is straightforward:
import gym
param = {"num_levels": 1, "distribution_mode": "hard"}
env = gym.make("procgen:procgen-leaper-v0", **param)

obs = env.reset()
while True:
    action = env.action_space.sample()
    obs, rewards, done, info = env.step(action)
    env.render()

    if done:
        break

This will generate a single level on which the algorithm can be trained. There are several options available to procedurally generate many different versions of the same environment:
-
num_levels- The number of unique levels that can be generated -
distribution_mode- What variant of the levels to use, the options are"easy","hard","extreme","memory","exploration". All games support"easy"and"hard", while other options are game-specific.
Reinforcement Learning
Now, it is finally time for the actual Reinforcement Learning. Although there are many packages available that can be used to train the algorithms, I will be mostly going into Stable Baselines due to their solid implementations.
Note that I will not be explaining how the RL-algorithms actually work in this post as that would require an entirely new post in itself. For an overview of state-of-the-art algorithms such as PPO, SAC, and TD3 please see this or this.
Stable Baselines
Stable Baselines (SB) is based upon OpenAI Baselines and is meant to make it easier for the research community and industry to replicate, refine, and identify new ideas. They improved upon on Baselines to make a more stable and simple tool that allows beginners to experiment with Reinforcement Learning without being buried in implementation details.
SB is often used due to its easy and quick application of state-of-the-art Reinforcement Learning Algorithms. Moreover, only a few lines of code are necessary to create and train RL-models.
Installation can simply be done with: pip install stable-baselines. Then, to create and learn an RL-model, for example, PPO2, we run the following lines of code:
from stable_baselines import PPO2
from stable_baselines.common.policies import MlpPolicy
model = PPO2(MlpPolicy, env, verbose=1)
model.learn(total_timesteps=10_000, log_interval=10)
There are a few things that might need some explanation:
-
total_timesteps- The total number of samples to train on -
MlpPolicy- The Policy object that implements actor-critic. In this case, a Multi-layer Perceptron with 2 layers of 64. There are also policies for visual information such as aCnnPolicyor evenCnnLstmPolicy
In order to apply this model to the CartPole example, we need to wrap our environment in a Dummy to make it available to SB. The full example of training PPO2 on the CartPole environment is then as follows:
from stable_baselines.common.policies import MlpPolicy
from stable_baselines.common.vec_env import DummyVecEnv
from stable_baselines import PPO2
import gym

env = gym.make('CartPole-v0')
env = DummyVecEnv([lambda: env])

model = PPO2(MlpPolicy, env, verbose=1)
model.learn(total_timesteps=50_000, log_interval=10)

obs = env.reset()
while True:
    action, _states = model.predict(obs)
    obs, rewards, dones, info = env.step(action)
    env.render()

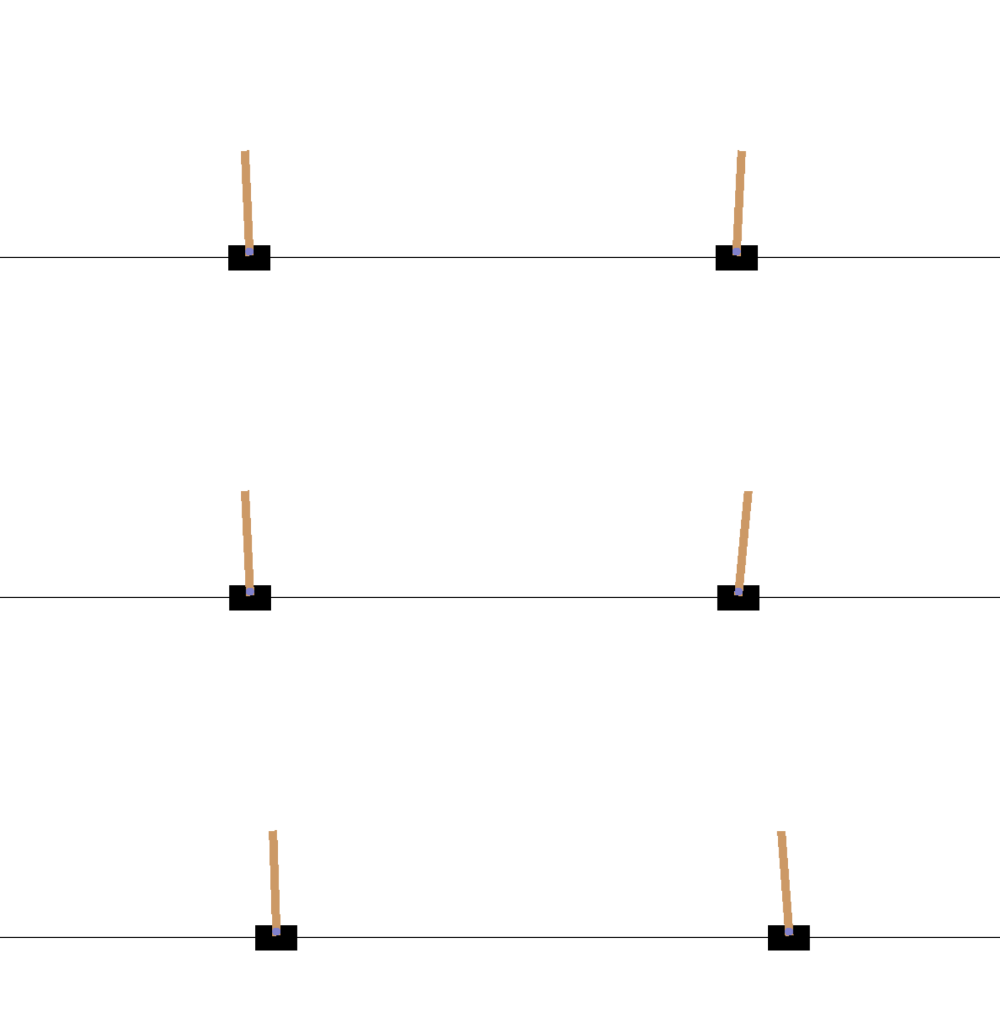
As we can see in the image above, in only 50,000 steps PPO2 has managed to find out a way to keep the pole stable. This required only a few lines of code and a couple of minutes of processing!
If you want to apply this to Procgen or Retro, make sure to select a policy that allows for a Convolution-based network as the observation space is likely to be the image of the current state of the environment.
Finally, the CartPole example is an extremely simple one which makes it possible to train it only 50,000 steps. Most other environments typically take tens of millions of steps before showing significant improvements.
NOTE: The authors of Stable Baselines warn beginners to get a good understanding when it comes to Reinforcement Learning before using the package in productions. There are many crucial components of Reinforcement Learning that if any of them go wrong, the algorithm will fail and likely leaves very little explanation.
Other Packages
There are several other packages that are frequently used to apply RL-algorithms:
-
TF-Agents - Requires significant more coding than Stable-Baselines, but is often the go-to package for research in Reinforcement Learning.
-
MinimalRL - State-of-the-art RL-algorithms implemented in Pytorch with very minimal code. It definitely helps in understanding the algorithms.
-
DeepRL - Another Pytorch implementation, but this version also has additional environments implemented to be used.
-
MlAgents - An open-source Unity plugin that enables games and simulations to serve as environments for training agents.
Conclusion
Reinforcement Learning can be a tricky subject as it is difficult to debug if and when something is going wrong in your code. Hopefully, this post helped you get started with Reinforcement Learning.
All code can be found here.